TABLE OF CONTENTS
While photo-editing software has become incredibly portable, it’s hard to deny the value of a proper workstation for professional work. The right setup won’t make you a better photographer, but it will help you edit faster and spend more time behind the camera.
This guide will walk you through everything you need to know about building a Photo Editing computer, taking a deep dive into the monitor choices, storage configurations, and color proofing environments that photographers need.
Who This Guide is For
With the rise of cellphone photography, the hardware requirements for casual photo editing have dropped significantly.
Smartphones can take photos in RAW, cheap sensors have amazing high-ISO performance, and adaptive algorithms have streamlined workflows that used to be tedious, all while consumer screens continue to use the same undemanding colorspaces.
A lot of what we’ll cover in this guide can be generalized to image manipulation and digital painting workflows, but it’s definitely biased towards photographers with high-fidelity print production workflows.
This guide is aimed at professionals, or at least professional budgets, and it won’t follow the mold of our more generalized build guides.
If photography isn’t a large part of your creative wheelhouse, some of the things covered in this guide won’t apply to you. 
This guide assumes that you work with large volumes of data, are editing and proofing print resolution images in high bit-depth formats, and that you care about precise color matching — things you genuinely need a workstation for.
If you’re a hobbyist, or even a new professional, don’t let the advice you’re about to read upstage your core priorities.
We’ll get into pixel-sniffing territory in a few places, but I’ll do my best to flag the stuff that only applies to those with studio-tier budgets.
What bottlenecks Photo Editing & Processing
Images are spreadsheets full of integers (most of the time). The data they contain isn’t complex at a granular level, and it’s formatted in a way that makes programmatic manipulation easy.
Simple adjustments to small photos can be done quickly on relatively slow hardware, and even advanced filters run on what amounts to a control mask and highschool calculus.
Photo editing gets demanding fast, though, once you start working at production resolutions and bit depths.
Professional image editing is computationally intense and inherently RAM-hungry, as the sheer number of calculations involved increases geometrically. Ample RAM and fast SSD’s for working drives and scratch disks are key.
RAM needs per Photoshop Layer
| Resolution (Megapixels) | 8bpc | 10bpc | 16bpc | 32bpc |
|---|---|---|---|---|
| 8MP | 24 MByte | 30 MByte | 48 MByte | 96 MByte |
| 12MP | 36 MByte | 45 MByte | 72 MByte | 144 MByte |
| 16MP | 48 MByte | 60 MByte | 96 MByte | 192 MByte |
| 20MP | 60 MByte | 75 MByte | 120 MByte | 240 MByte |
A strong GPU is important for 4k+ production pipelines, and most image processing programs use GPU acceleration for display rendering, zooming, and navigation, but the bulk of the actual processing happens on the CPU.
Programs like Lightroom perform wonderfully on processors with strong single-thread performance, and they’re built to take advantage of multi-threading, but the overall processing load favors balanced processor designs.
Secondary Hardware for Photo Editing & Processing
While good hardware won’t improve bad editing techniques, the right setup can make bad edits easier to spot.
The things we’re going to look at next — wide gamut monitors, color calibration tools, and advanced data management configurations — are fairly specific to photo editing, but they’re important for professionals.
Wide Gamut Monitors
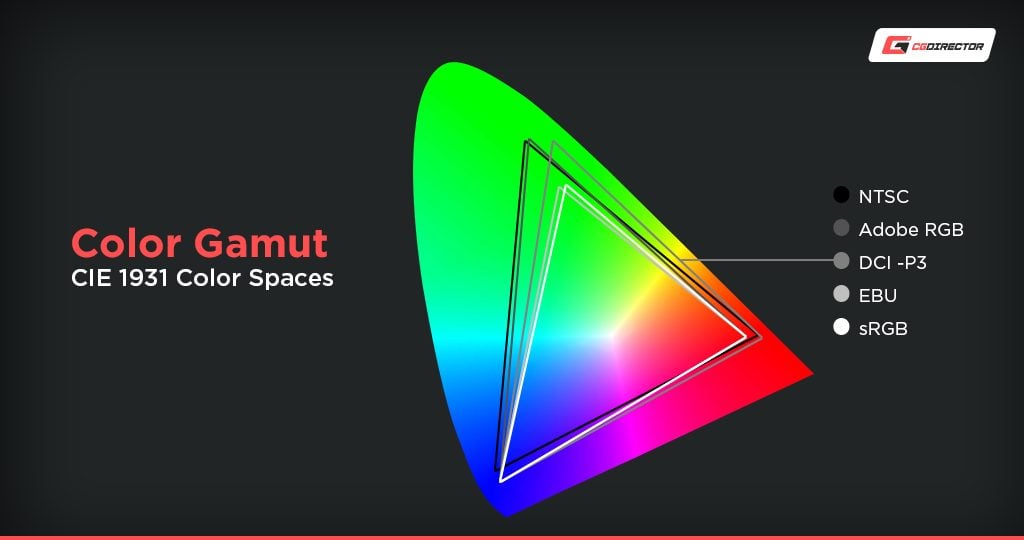
The Adobe Wide-Gamut RGB color space covers 77.6% of the CIELAB reference color space.
The most commonly used color space, sRGB, only covers 35.9%. The DCI-P3 color space, a cinematic projection standard that has become popular among cell phone manufacturers, only covers 45.5%.
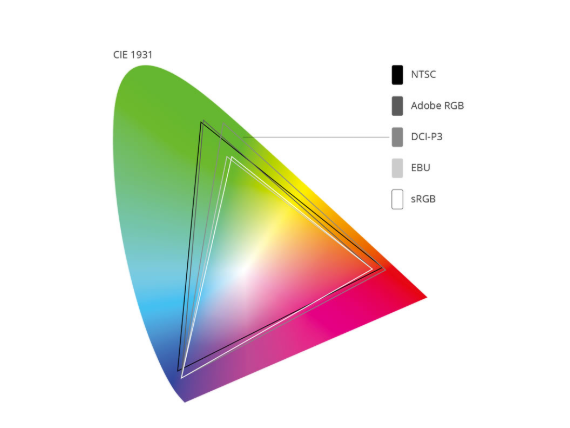
Image-Source: Viewsonic
Camera sensors are capable of capturing color ranges far wider than screens and printers can reproduce.
Taking photos in RAW and “editing down” to a particular display medium is standard practice for most photographers, but it isn’t the easiest thing to do when you can’t see the colors you’re working with.
Using a wide color gamut monitor for accurate editing, and then a reference display and/or test prints in order to ensure consistent color conversion later on, can make your workflow more efficient and your end product more consistent, but it won’t make on-location color checking or pre-publication proofing any less important.
If you’re a professional photographer, I’m going to recommend a wide-gamut monitor. If you’re a hobbyist, it isn’t mission-critical.
If you’re on a tight budget and you have to choose between performance and accuracy, it’ll depend on the kind of work you do and what hardware you already have.
Screen Color Profilers
Non-photographers might scoff at the idea of spending a few hundred dollars on an external calibration device, but screen calibrators aren’t the camera junky’s version of harmonized audio cables.
They’re niche tools designed to help photographers maintain consistent multi-display and/or multi-device editing environments, but they do what they’re designed to do.
Computer monitors tend to prioritize pleasing color renditions over accurate color renditions, which means they tend to be punchier, brighter, and more saturated than you’d want for photo editing.
Screen profilers help you work past the knee-jerk desire to make things look good when ‘good’ isn’t the goal. As someone who happens to be partially colorblind (protanomalous), being able to calibrate a screen without having to rely on my own vision is nice.
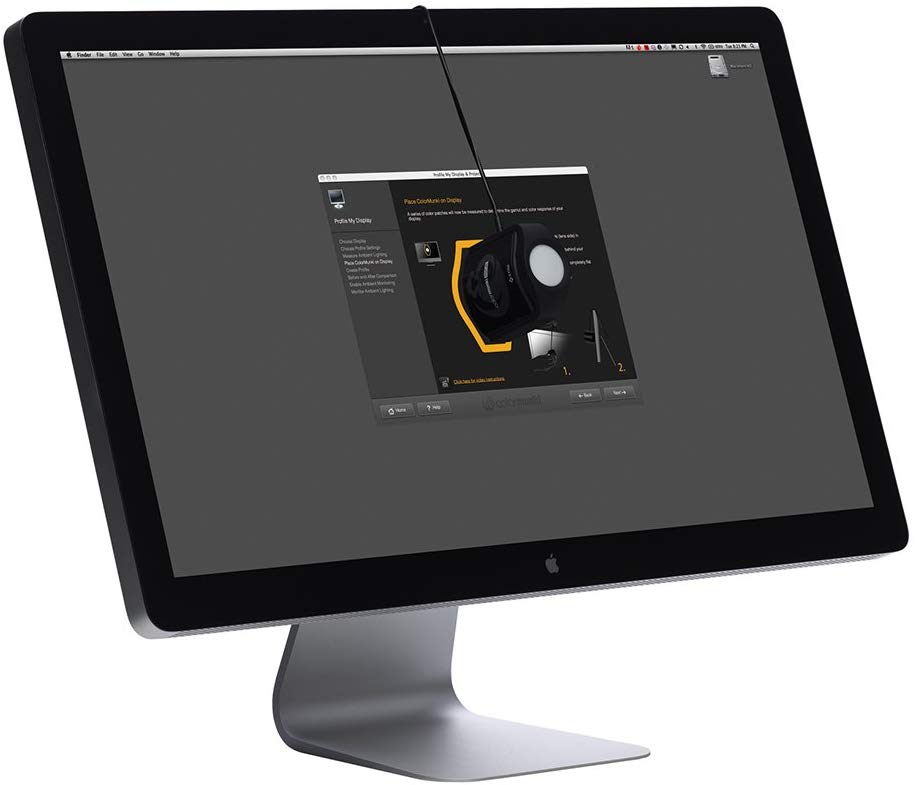
Image-Credit: xRite
That said, I don’t see them as mandatory purchases.
They’re useful, especially when you’re working with monitors from multiple manufacturers, and I’ve had a great experience using X-Rite’s i1Display, but I won’t tell you to cut corners elsewhere in order to fit a calibrator into your budget.
Hyper-Convenient I/O
While fast SSD’s have an impact on the editing and managing side of things, there’s more to a proper storage configuration than speed and capacity.
You need to get your photos off your camera, sort them, tag them, make them accessible to both yourself and your clients, and do it all in a way that doesn’t take you away from your main work for too long.
A smart combination of card readers, case I/O choices, and network infrastructure can turn this inescapable intermediary step into an incredibly simple one if you plan it all out.
There are a number of ways you can tackle this, and we have a definitive guide to storage configurations in the works.
Building Your Photo Editing Workstation
CPU
While image editing doesn’t have the same processor demands as, say, animation or visual effects, the demand does scale with resolution. Intel processors have been the traditional pick for most Adobe software suites, but that dynamic has changed with AMD’s latest offerings.
Pugetsystems ran a series of CPU benchmarks that specifically targeted Photoshop performance, and they wrote a solid CPU performance round-up for Lightroom classic more recently. If you want to get into the nitty-gritty, both are worth reading.
| CPU Name | Cores | Ghz | Photoshop Score | Price | Value |
|---|---|---|---|---|---|
| AMD Ryzen 7 3800X | 8 | 3.9 | 1027 | 399 | |
| Intel i9 9800X | 8 | 3.8 | 841 | 589 | |
| AMD Ryzen 5 3600X | 6 | 3.8 | 925 | 249 | |
| AMD Ryzen 9 3900X | 12 | 3.8 | 1040 | 499 | |
| AMD Ryzen 7 5800X | 8 | 3.8 | 1195 | 449 | |
| AMD Ryzen 7 2700X | 8 | 3.7 | 813 | 251 | |
| Intel i5 9600K | 6 | 3.7 | 881 | 262 | |
| Intel core i9 10900K | 10 | 3.7 | 1071 | 550 | |
| AMD Ryzen 5 5600X | 6 | 3.7 | 1114 | 299 | |
| AMD Ryzen 9 5900X | 12 | 3.7 | 1178 | 549 | |
| AMD Ryzen 5 2600X | 6 | 3.6 | 785 | 149 | |
| AMD Ryzen 5 3600 | 6 | 3.6 | 915 | 199 | |
| Intel i9 9700K | 8 | 3.6 | 931 | 362 | |
| AMD Ryzen 7 3700X | 8 | 3.6 | 964 | 329 | |
| Intel i9 9900K | 8 | 3.6 | 1026 | 488 | |
| AMD Threadripper 2920X | 12 | 3.5 | 811 | 369 | |
| AMD Threadripper 2950X | 16 | 3.5 | 815 | 729 | |
| Intel i9 9900X | 10 | 3.5 | 903 | 989 | |
| Intel i9 9920X | 12 | 3.5 | 917 | 1189 | |
| AMD Ryzen 9 5950X | 16 | 3.4 | 1203 | 799 | |
| Intel i9 9820X | 10 | 3.3 | 845 | 889 | |
| Intel i9 9940X | 14 | 3.3 | 893 | 1387 | |
| Intel i9 9960X | 16 | 3.1 | 901 | 1684 | |
| AMD Threadripper 2990WX | 32 | 3.0 | 744 | 1699 | |
| AMD Threadripper 2970WX | 24 | 3.0 | 747 | 1300 | |
| Intel i9 9980XE | 18 | 3.0 | 914 | 1979 | |
| CPU Name | Cores | GHz | Photoshop Score | Price | Value |
The most relevant takeaway from these benchmarks is that high-end CPU’s aren’t necessarily the best choice for photo editing.
Programs like Photoshop and Lightroom deliver the best performance when they’re paired with generalist processors, like the Ryzen 9 5900x or the Intel i9 10900K.

These processors have high clock speeds, reasonable core counts, and mature processing architectures, delivering strong single-thread performance at an incredible price-to-performance ratio.
While a Threadripper can be a solid pick for a 3D-Artist who renders a lot, processors designed for rendering and data processing don’t offer the right balance of clock speeds and core counts for photo editing.
Paying a premium for features that Photoshop and Lightroom aren’t built to take advantage of would be pointless, no matter your budget.
CPU Recommendations
- AMD Ryzen 5900X, 12-Core
- AMD Ryzen 5800X, 8-Core
- Intel i9 10900K, 10-Core
- Intel i7 10700K, 8-Core
- Budget Pick: AMD Ryzen 3600, 6-Core
GPU
The right GPU for your photo editing workstation is the one built to support the monitor resolution you’re interested in working at.
An entry-level GPU won’t be much of a bottleneck with sub-4k monitors, but you’ll need to spend more if you’re planning to invest in high-resolution displays.
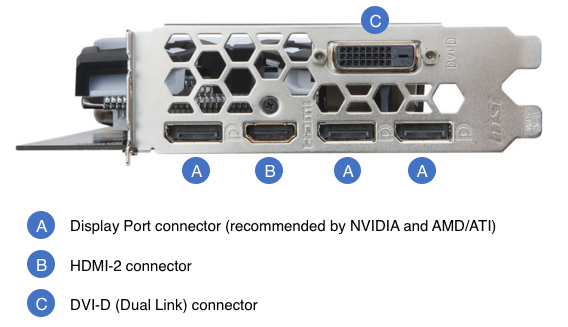
Image-Credit: MSI
Either way, since you won’t be relying on the compute capabilities of your GPU, the CUDA versus OpenCL (Nvidia vs. AMD) debate isn’t as performance-critical as it can be in other circumstances.
One could argue that Adobe has a tighter relationship with Nvidia than AMD, which can have an impact on video editing and 3D effects in Photoshop, but the value of that will ultimately depend on your workflow — and the differences still won’t be that significant.
Multi-GPU configurations aren’t that helpful for photo editing — you won’t see a significant benefit in editing or display performance, and your money is best spent elsewhere.
GPU Recommendations
- Nvidia RTX 3080
- Nvidia RTX 3070
- Nvidia RTX 3060 Ti
- Nvidia RTX 1660 Super
- AMD Radeon RX5700
- AMD Radeon RX5700 XT
- Budget Pick: Nvidia GTX 1660Ti
RAM
Photo editing is memory-intensive, especially when you’re working with large image libraries. You don’t have to use a medium format camera to hit RAM bottlenecks in Photoshop or Lightroom, and pinching pennies on this front won’t help you in the long run.
In our RAM for Video Editing guide, Alex recommends 32GB (or more) of RAM for videographers who have a tendency to multi-task. The same goes for photo editing.
Can a disciplined photographer make do with 16GB? Absolutely. Is the hassle of closing background apps and waiting for Photoshop to pull data from your scratch disks worth the ~$70 you’ll save?
Not really.

Image-Source: Corsair
While I probably wouldn’t recommend more than 64GB of RAM to the average photographer, I will recommend 32GB of RAM as a starting point for anyone with a reasonable budget.
RAM Recommendations
- Corsair LPX Vengeance 16GB DDR4 3200Mhz
- Corsair LPX Vengeance 32GB DDR4 3200Mhz
- Corsair LPX Vengeance 64GB DDR4 3200Mhz
Storage
As CG Director’s resident data-horder, my default storage configuration advice is largely based on my experience with photo and video editing in studio environments.
If you’re just starting out and your budget is limited, the SDD + HDD setup that’s recommended in most build guides should be fine. You won’t have a separate drive to use as a scratch disk and you won’t have any redundancy in your setup, but it’ll be serviceable in the short-term.
If you’re handling photos in volume, though I’ll always recommend a multi-SSD configuration with an HDD for archiving, right out of the gate.
For the ultimate performance, you can even consider an NVMe SSD. These are a bit more expensive than regular (SATA) SSDs, but many times faster.
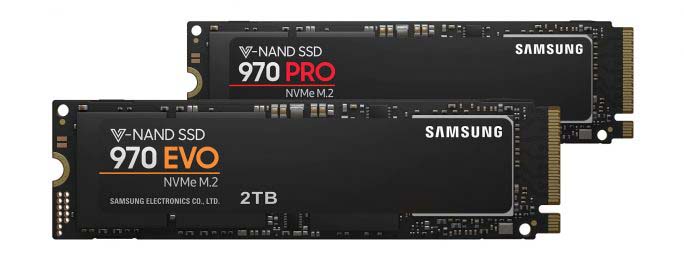
When it comes to external storage, my general recommendation for anyone who doesn’t have an established need to access their photos from multiple devices is to focus on internal storage first.
A NAS configuration is useful if you use multiple computers, work with other photographers, or have other media files you want to serve, but that convenience doesn’t come cheap or easy.
Network-attached storage is inherently limited by your local network, and consumer-oriented networking hardware will severely bottleneck your read/write speeds.
If you’re 100% committed to setting up a local network that can handle SSD NAS configurations with minimal bottlenecks, check out the 10GBe network hardware recommendations in the accessories section below.
Storage Recommendations
- OS and Application Storage
- Active Project Files
- Archiving / Backup
Monitors
Even with everything we’ve already covered regarding monitors and colorspaces, this section’s a doozy.
Different photographers will give you different monitor recommendations. There are plenty of professionals out there that don’t use wide-gamut monitors, and there are just as many who’ll swear they can’t work without them.
Instead of making a flat recommendation for a particular color space or feature set, we’re going to cover the decision-making process and where it’ll lead you.
For some, that’ll be a wide-gamut monitor; for others, it won’t be.
Assigning a Price-Point to Color Accuracy
If you’re a freshly minted photographer and you’re in a position where you have to choose between a better monitor and a better lens, get the lens. I’ll recommend a wide gamut monitor to an established professional without hesitation, but I won’t pretend the price point is viable for low budget workstations.
That said, a wide gamut monitor isn’t all that expensive compared to other photography equipment. If you’re in a position where you’re buying good glass, you can probably afford a halfway-decent screen.
Who Needs Color Accuracy the Most?
If you restore photos, do product photography, or work with clients who care about accurate brand color representation (event photography for universities, etc), a wide-gamut monitor should be an easy buy.
You’re doing work where pixel-sniffing is an inherent part of the job and you can’t smell colors you can’t see.

Simplified Illustration of Bit-Depth on Monitors
If you’re targeting audiences that are primarily viewing your photos on mobile devices, photographing subjects that don’t need strictly consistent color representation, and/or your clients don’t care as much about visual branding, don’t worry too much if a wide-gamut monitor doesn’t fit your budget. Should you get one eventually? Yeah.
Does it need to be a part of this build? Not necessarily.
How Much of Your Budget Should You Spend on a Monitor?
Dropping $500-$800 on a wide-gamut monitor isn’t unreasonable when you already have a workstation, but the math changes when you’re trying to put together a complete setup for $1400.
You shouldn’t break the bank on a 4k wide-gamut monitor if you can’t afford a GPU powerful enough to drive it, but you should still get a screen that’s worth looking at.
General Monitor Recommendations
In general, though, you’ll want an IPS monitor that covers the full sRGB range, with wide viewing angles, a matte screen finish, and some sort of dead pixel guarantee from the manufacturer. Our monitor guide for creative professionals covers those bases in detail.
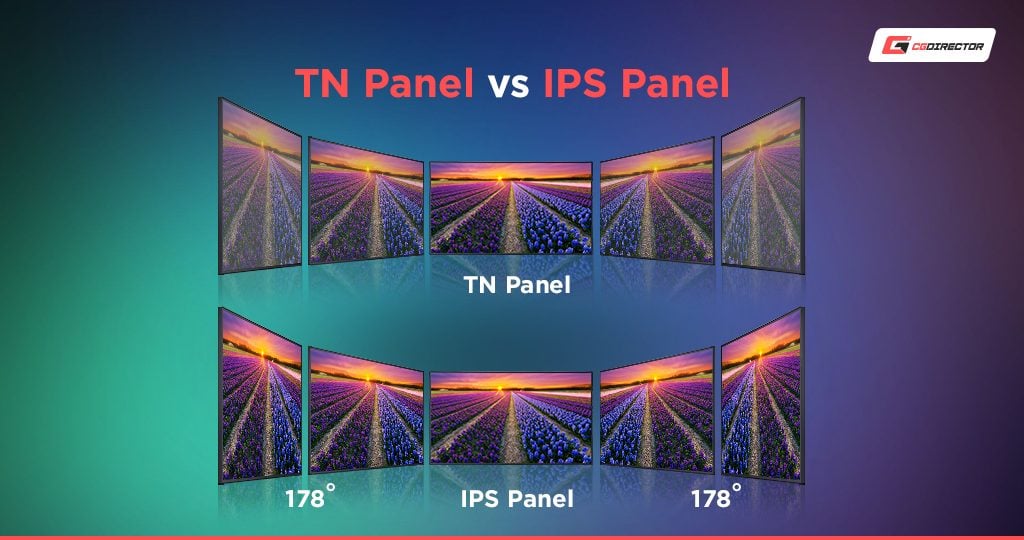
Other features to look for include minimal backlight bleed, a shroud if you’re editing in overly bright lighting conditions, and a VESA compatible mount for proper ergonomics.
Don’t worry about things like software-assisted contrast and color enhancement; you shouldn’t use those kinds of features in the first place. Grey-to-grey response times aren’t all that critical for photo editing, but they’re worth looking at if you’re a generalist.
Specific Monitor Recommendations
- Best Allrounder: Dell UltraSharp UP2716D, 27″
- For serious color work: Eizo ColorEdge CG2420, 24″
- Extreme Budget: Philips 276E8VJSB
- 4K + Color Accuracy: ASUS ProArt PA329Q
- Color-Accurate QHD: BenQ SW271 27”
Case and Power Supply
Photo editing workstations don’t come with any inherently unique case or PSU requirements, but there are some factors to consider when it comes to I/O ports, form factor, and portability.
Photographers tend to work with a lot more external data, which inevitably means messing with card readers, USB hubs, NAS enclosures, network bridges, and the like.
Choosing a larger and/or less aesthetic case that has more I/O ports, or specifically integrating a high-speed hub into your base build plan, can be a good idea.

Image-Credit: Phanteks
On the other hand, having worked in some fairly crowded studios, small form factor workstations can be incredibly convenient — they fit anywhere, they’re great for sit-stand setups, they can be used on-location when you’re working an extended photo-op, and they cost less than a laptop with comparable specs.
The build process is more time consuming, you’ll have to pay closer attention to GPU lengths and CPU cooler sizes, and you’ll probably want to invest in an external enclosure for your hard drives, but the extra work can be worth it when you don’t have elbow room to spare.
When it comes to power supplies, the standard advice applies. An efficient modular PSU that meets your power requirements with some headroom to spare will get the job done. Don’t cheap out, don’t re-use cables from other power supplies, don’t plug it into an ungrounded socket. Easy-peasy.

Image-Credit: Corsair
Case Recommendations
Small Form Factor
- For SFF Beginners: NZXT H200 Mini-ITX
- The Micro Classic: Ghost S1 Mini-ITX
Mid-Tower (Standard-Sized Build)
- Phanteks Enthoo Pro ATX Mid Tower Case
- Corsair Carbide Series 200R ATX Mid Tower Case
- Corsair Carbide Series 275Q ATX Mid Tower Case
PSU Recommendations
- 550W: Corsair CX Series CX550 550W ATX 2.4 Power Supply
- 760W: Corsair Professional Series Platinum AX760 760W Power Supply
- 1000W: be quiet! Straight Power 11 1000W ATX 2.4 Power Supply
Motherboards
Rather than try to reinvent the wheel here, I’m going to defer to Jerry’s excellent motherboard guides for Intel and AMD processors.
Photography workstations don’t differ all that much from other workstations in terms of motherboard requirements, although I would argue that a photographer might place a slightly greater emphasis on Thunderbolt and USB 3.0 support.
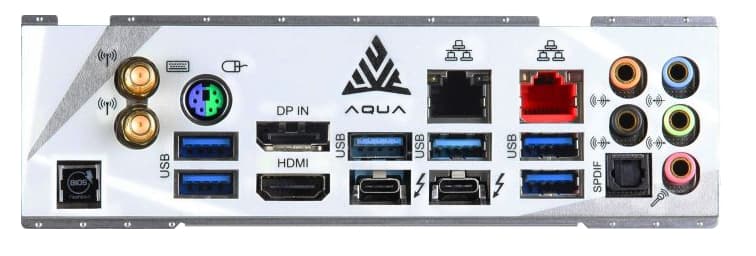
Thunderbolt Support on ASRock X570 Aqua
Accessories
There’s a wide variety of peripherals marketed to photographers. Some of them, like monitor calibrators, are relevant enough to photo editing workflows that they’re worth considering in a build guide like this one. Others aren’t. We can’t cover all of the PC accessories photographers might need, but here are a few common ones.
Graphics Tablets
Graphics tablets are oddly common in photography studios, but they’re rarely critical accessories. Don’t worry about fitting one in your workstation budget if you don’t have a firm use-case.
Hardware Controllers
Knobs, faders, jog wheels, arcade buttons, modified MIDI controllers — if you can hook it up, someone’s probably found a way to control Lightroom with it.
Hardware controllers are unexpectedly popular among photographers in the same way that graphics tablets are, and the benefits are equally subjective.
I’ll sing the praises of the weird collection of footswitches and macro pads I use on a day-to-day basis in other contexts, but I won’t pretend they’re worth including in a build guide for photographers.
Card Readers, Converters, and USB Hubs
If you’re a professional photographer, you probably have a drawer full of card readers and adapters. Who doesn’t? If you haven’t taken the time to coordinate (and prune) that haphazard collection, though, rolling that work into your workstation build plan isn’t a bad idea.
Reusing an old USB 2.0 hub or PCIe 2.0 internal card reader will create unnecessary bottlenecks in the least interesting part of your workflow. While extraneous input devices are decidedly non-critical, setting aside some money to refine and improve your data handling is a smart move.
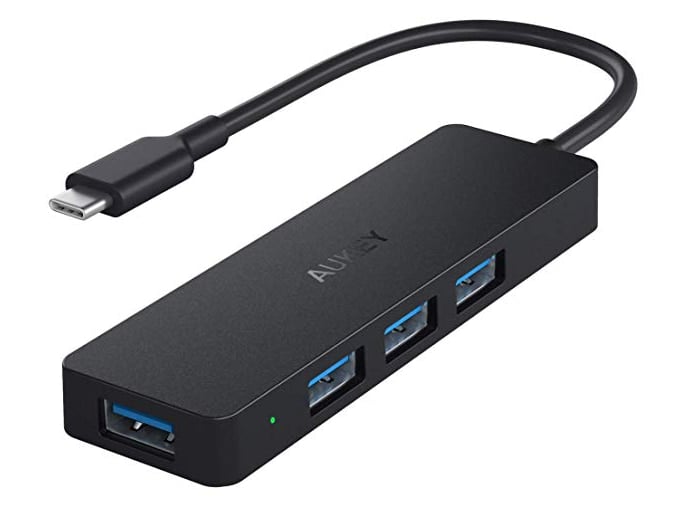
Image-Credit: Aukey
A Thunderbolt 3 hub can be incredibly helpful; the transfer speeds are worth the price and you’ll see consistent performance from the rest of the ports and converters.
An internal Thunderbolt card can also be a good idea, but you’ll have to pay attention when you’re buying your motherboard to make sure everything’s compatible.
Recommendations
- A High-End Thunderbolt Hub: CalDigit TS3 Plus
- A Mid-Range Thunderbolt Hub: CalDigit USB-C Pro Dock
- An Ultra-Portable USB Hub: AUKEY USB C Hub Ultra Slim
- An Internal Option: GIGABYTE Alpine Ridge Thunderbolt 3 PCIe Card
NAS and LAN Hardware
If you’re looking for a backup career as a sysadmin, this section is for you. While most NAS manufacturers like to claim that their products are plug-and-play, they rarely deliver adequate performance that way.
If the hardware recommendations below sound completely alien, don’t worry — this video guide covers the basics. This setup won’t make your internet or wifi any faster, but it will have a huge impact on NAS performance.
A properly managed 10GBe network is amazingly robust; you’ll struggle to saturate your bandwidth, even in multi-user environments. Throw in a few laptop stations and a thin client for nearly-headless offloading, and you’ll be set to compete with enterprise networks.
LAN Hardware Recommendations
- Switch: MikroTik CRS305
- Cables: 10Gtek SFP+ DAC Cables
- Adapters: Finisar FTLX8571D3BCL
NAS Recommendations
‘Normal’ Network Hardware
If you haven’t upgraded your modem or router in a while and you’re looking to upgrade your studio network without going down the 10GBe rabbit hole, I’d strongly recommend looking into Ubiquiti.
Their switches and AP’s are rock-solid and their network management software is some of the best in the business. Running an EdgeRouter Lite with a UniFi Dream Machine is an easy way to set up a robust studio network without the enterprise-scale overhead.
Example Builds
Best Budget Computer for Photo Editing, ~700$ Build
Best Computer for Photo Editing, AMD oriented 6-Core, ~1200$ Build
Best Computer for Photo Editing, AMD oriented 12-Core, ~1900$ Build
Best Computer for Photo Editing, Intel oriented 10-Core, ~2000$ Build
That’s about it! What Photo Editing PC are you thinking of buying?
![Best Computer for Photo Editing [2024 Guide] Best Computer for Photo Editing [2024 Guide]](https://www.cgdirector.com/wp-content/uploads/media/2019/11/Twitter-1200x675-1200x675.jpg)

![Should You Build a PC? [7 Great Reasons] Should You Build a PC? [7 Great Reasons]](https://www.cgdirector.com/wp-content/uploads/media/2023/11/Should-You-Build-a-PC-7-Reasons-For-Building-a-PC-Twitter-594x335.jpg)
![Is GIGABYTE a Good Brand? [2024 Update] Is GIGABYTE a Good Brand? [2024 Update]](https://www.cgdirector.com/wp-content/uploads/media/2023/07/Is-GIGABYTE-a-Good-Brand-Twitter-594x335.jpg)


61 Comments
24 August, 2023
Some photo editing software offloads a lot of processing to the GPU, for example ON1 Photo RAW. With the race to introduce more and more “AI” functionality, other software is also becoming more dependent on the GPU.
1 April, 2023
Hi Alex, I posted on the forum on 1/13/22 titled Need help with new Photoshop (2022) version 23.1 build advice. Would you still recommend this build for Photoshop (24.3), AfterEffects (23.3), Blender (3.5).
Thanks for the help.
Emily
1 April, 2023
Hi Alex, I posted in the forum on 1/13/22 titled Need help with new Photoshop (2022) version 23.1 build advice. Would you still recommend this build for Photoshop version 24.3, AfterEffects version 23.3 and Blender version 3.5 Thanks!
17 March, 2022
the only thing that don’t need a photographer…is a dedicated gpu… i have 2 wks, one with Ryzen7 5700G with vega integrated and one with i9 12900 with 6700xt… same score in PS (only 2/3 filter really need dedicated video card for fast work) and in C1… (on Win11) …what photographer really needs is CLOCK and RAM…. not video card … 😉
18 March, 2022
Thanks for the feedback! You’re right, the GPU isn’t as important in Photo Editing within Photoshop as an iGPU will perform roughly the same.
Not all iGPUs are created equal, though and if your workloads within photoshop and other editing software are GPU intensive, you’ll certainly see at least a 30% performance difference of e.g. an Intel UHD 630 vs a RTX 3070. Whether it warrants the huge price difference, of course, is also a question of how much you’re willing to spend for some performance gains.
Cheers,
Alex