TABLE OF CONTENTS
There are a few things that strike fear in PC users’ hearts; the blue screen of death (BSOD), high internal temperatures, and loud buzzing noises, to name a few.
But is something else that induces nightmares?
When your computer turns on and off repeatedly.
It’s crushing — even if you have tons of tech experience under your belt!
To make matters worse, you don’t usually receive a clear error message and are left in the dark about what’s causing the booting problem. This can make troubleshooting tricky, especially if you’ve never encountered an issue like this before.
But don’t panic just yet. In most cases, the cause isn’t as bad as you think. And no, it doesn’t necessarily mean one of your hardware components is fried (it could be something as simple as dust clogging up your PC).
Today, we’ll help you navigate this infuriating problem and share the most common causes and solutions. We’ll then address some frequently asked questions.
How to Fix A Computer Turn On and Off Repeatedly: 6+ Troubleshooting Methods
We’ll start with the basics and then progress through some more advanced troubleshooting steps to help you diagnose the issue.
As always, don’t forget to inspect your cables closely and test the power outlet first — it’ll save you a whole of time if it turns out that you did just have a loose cable!
You should also double-check if your PC is still under warranty. If it is, your best bet is to send it to your manufacturer for repairs. Most warranties cover these kinds of problems and your manufacturer will likely fix (or replace) your device at no additional cost.
If your device isn’t under warranty, don’t sweat it! We’re sure one of the troubleshooting methods below will work out for you.
So, let’s get right into it!
1. Check the Power Button
A common (but often overlooked) cause is a sticky power button; debris or liquid residue can end up trapped inside the crevices and stop them from working correctly.
If this is the case, you’ll usually feel some resistance, or a “stickiness,” when you press down on the button.
You should try and clean the power button to see if it solves the issue.
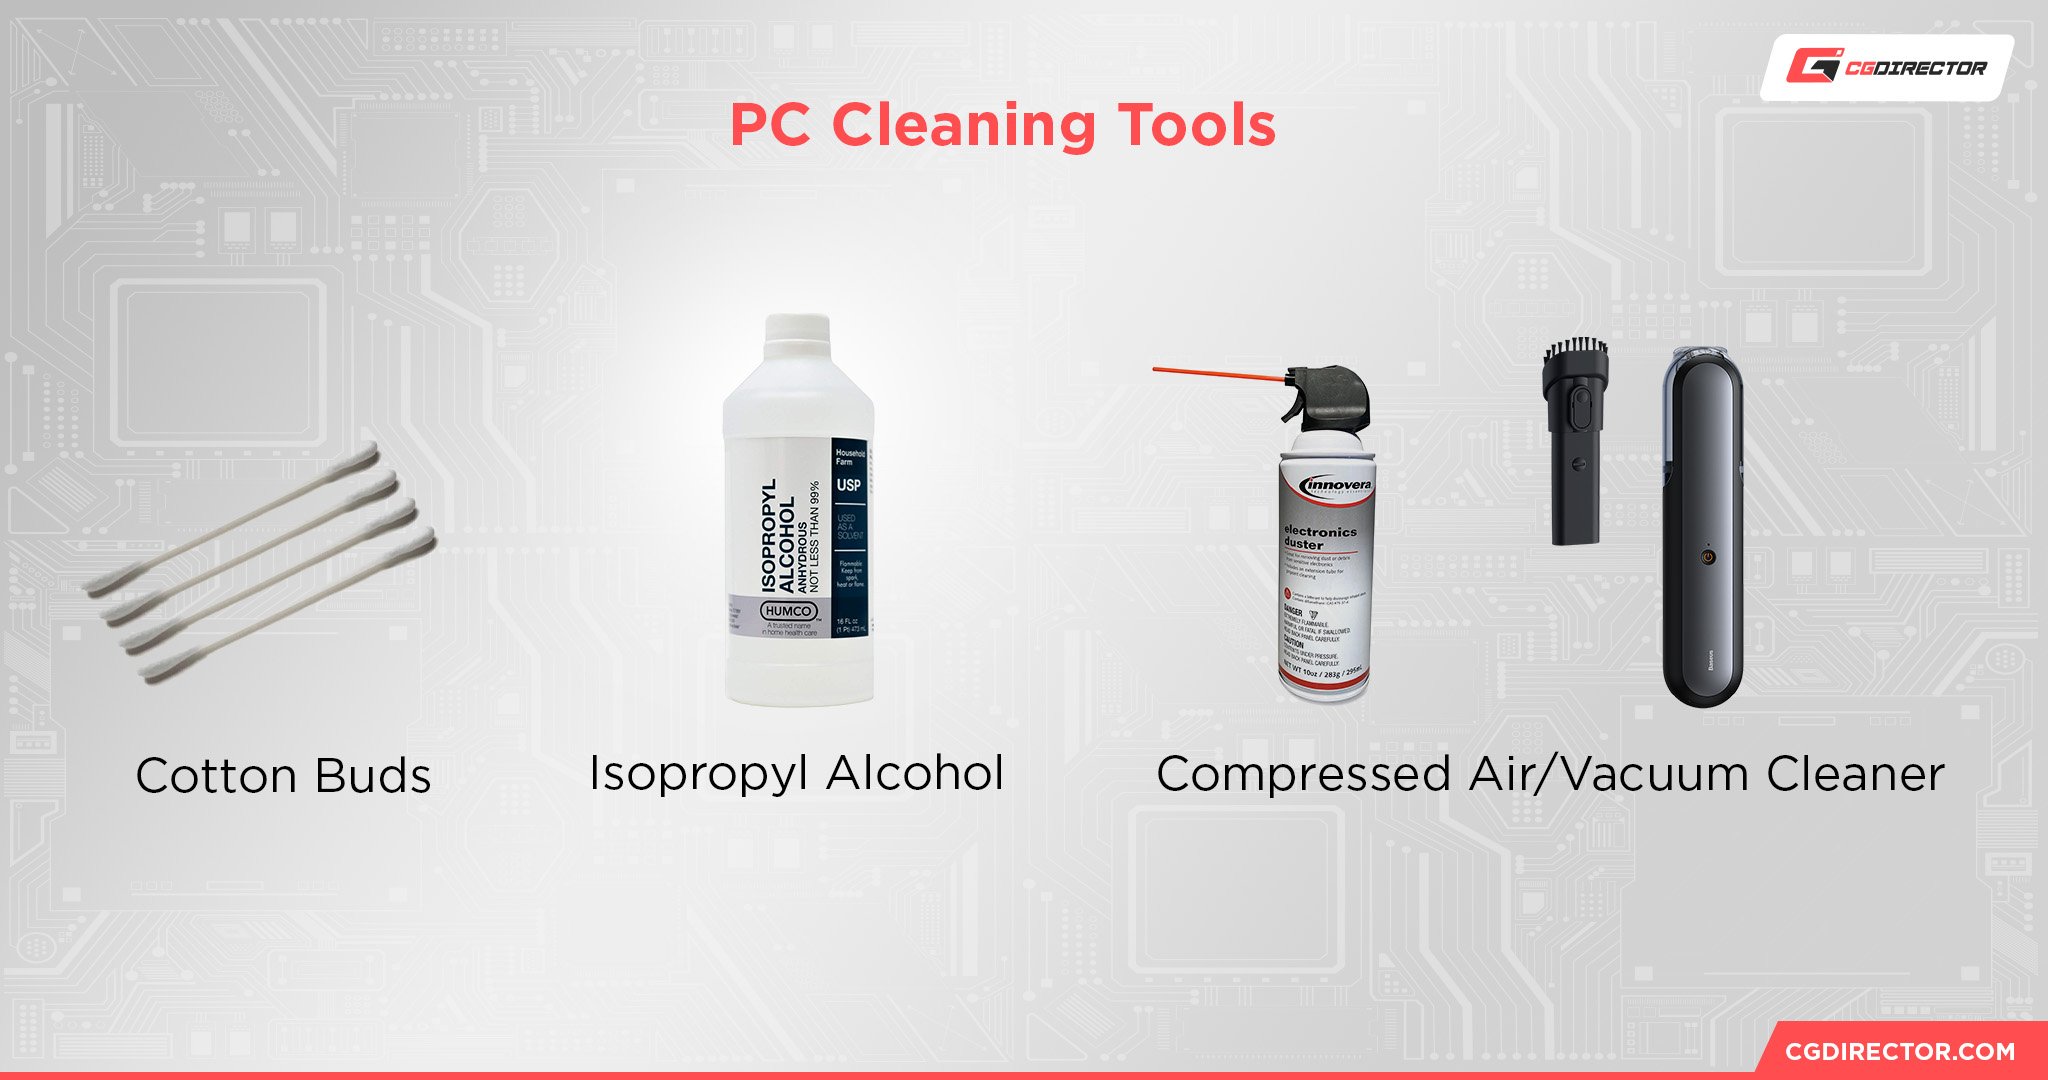
Make sure to turn everything off and unplug all cables, then using a Q-tip damp with 99% isopropyl alcohol, dab around the button to clear out any dust. Press the button while cleaning to help the solution get into all the crevices.
Once everything is completely dry, plug everything back and switch on your PC to test whether the issue persists. If it does, you’ll next want to determine whether the power button is faulty:
- Make sure everything is turned off and then open up your PC
- Locate the front panel header and check that the power switch cable is connected to the correct pins on the header (usually marked as POWER SW or PWR SW). Also, inspect for signs of cable damage and wear.
- If the jumper cable is properly connected and in working order, you can try manually jumping the power switch pins or swapping the power switch with the reset switch
If your PC boots up, it’s a telltale sign your power button is defective and needs to be replaced. If it doesn’t, then you’ll want to take a closer look at your power supply unit (PSU).
This brings us nicely to our next troubleshooting step:
2. Inspect the Power Supply Unit
A faulty power supply unit can cause a whole host of issues and even stop your computer from booting up properly, so you’ll definitely want to troubleshoot your PSU before any other hardware component.
Top tip: Don’t forget to also check that the PSU cables are correctly connected.
While we can’t cover all the troubleshooting steps here — check out ITProTV’s in-depth video guide for further help — we do want to address the most common PSU problem: insufficient wattage.
You can get a rough estimate of what kind of power your PC needs to run smoothly by using a power consumption calculator like PC Part Picker. Calculators do tend to overestimate and give you a “worst case scenario” outcome (i.e. what you would need if your system was constantly under heavy load).
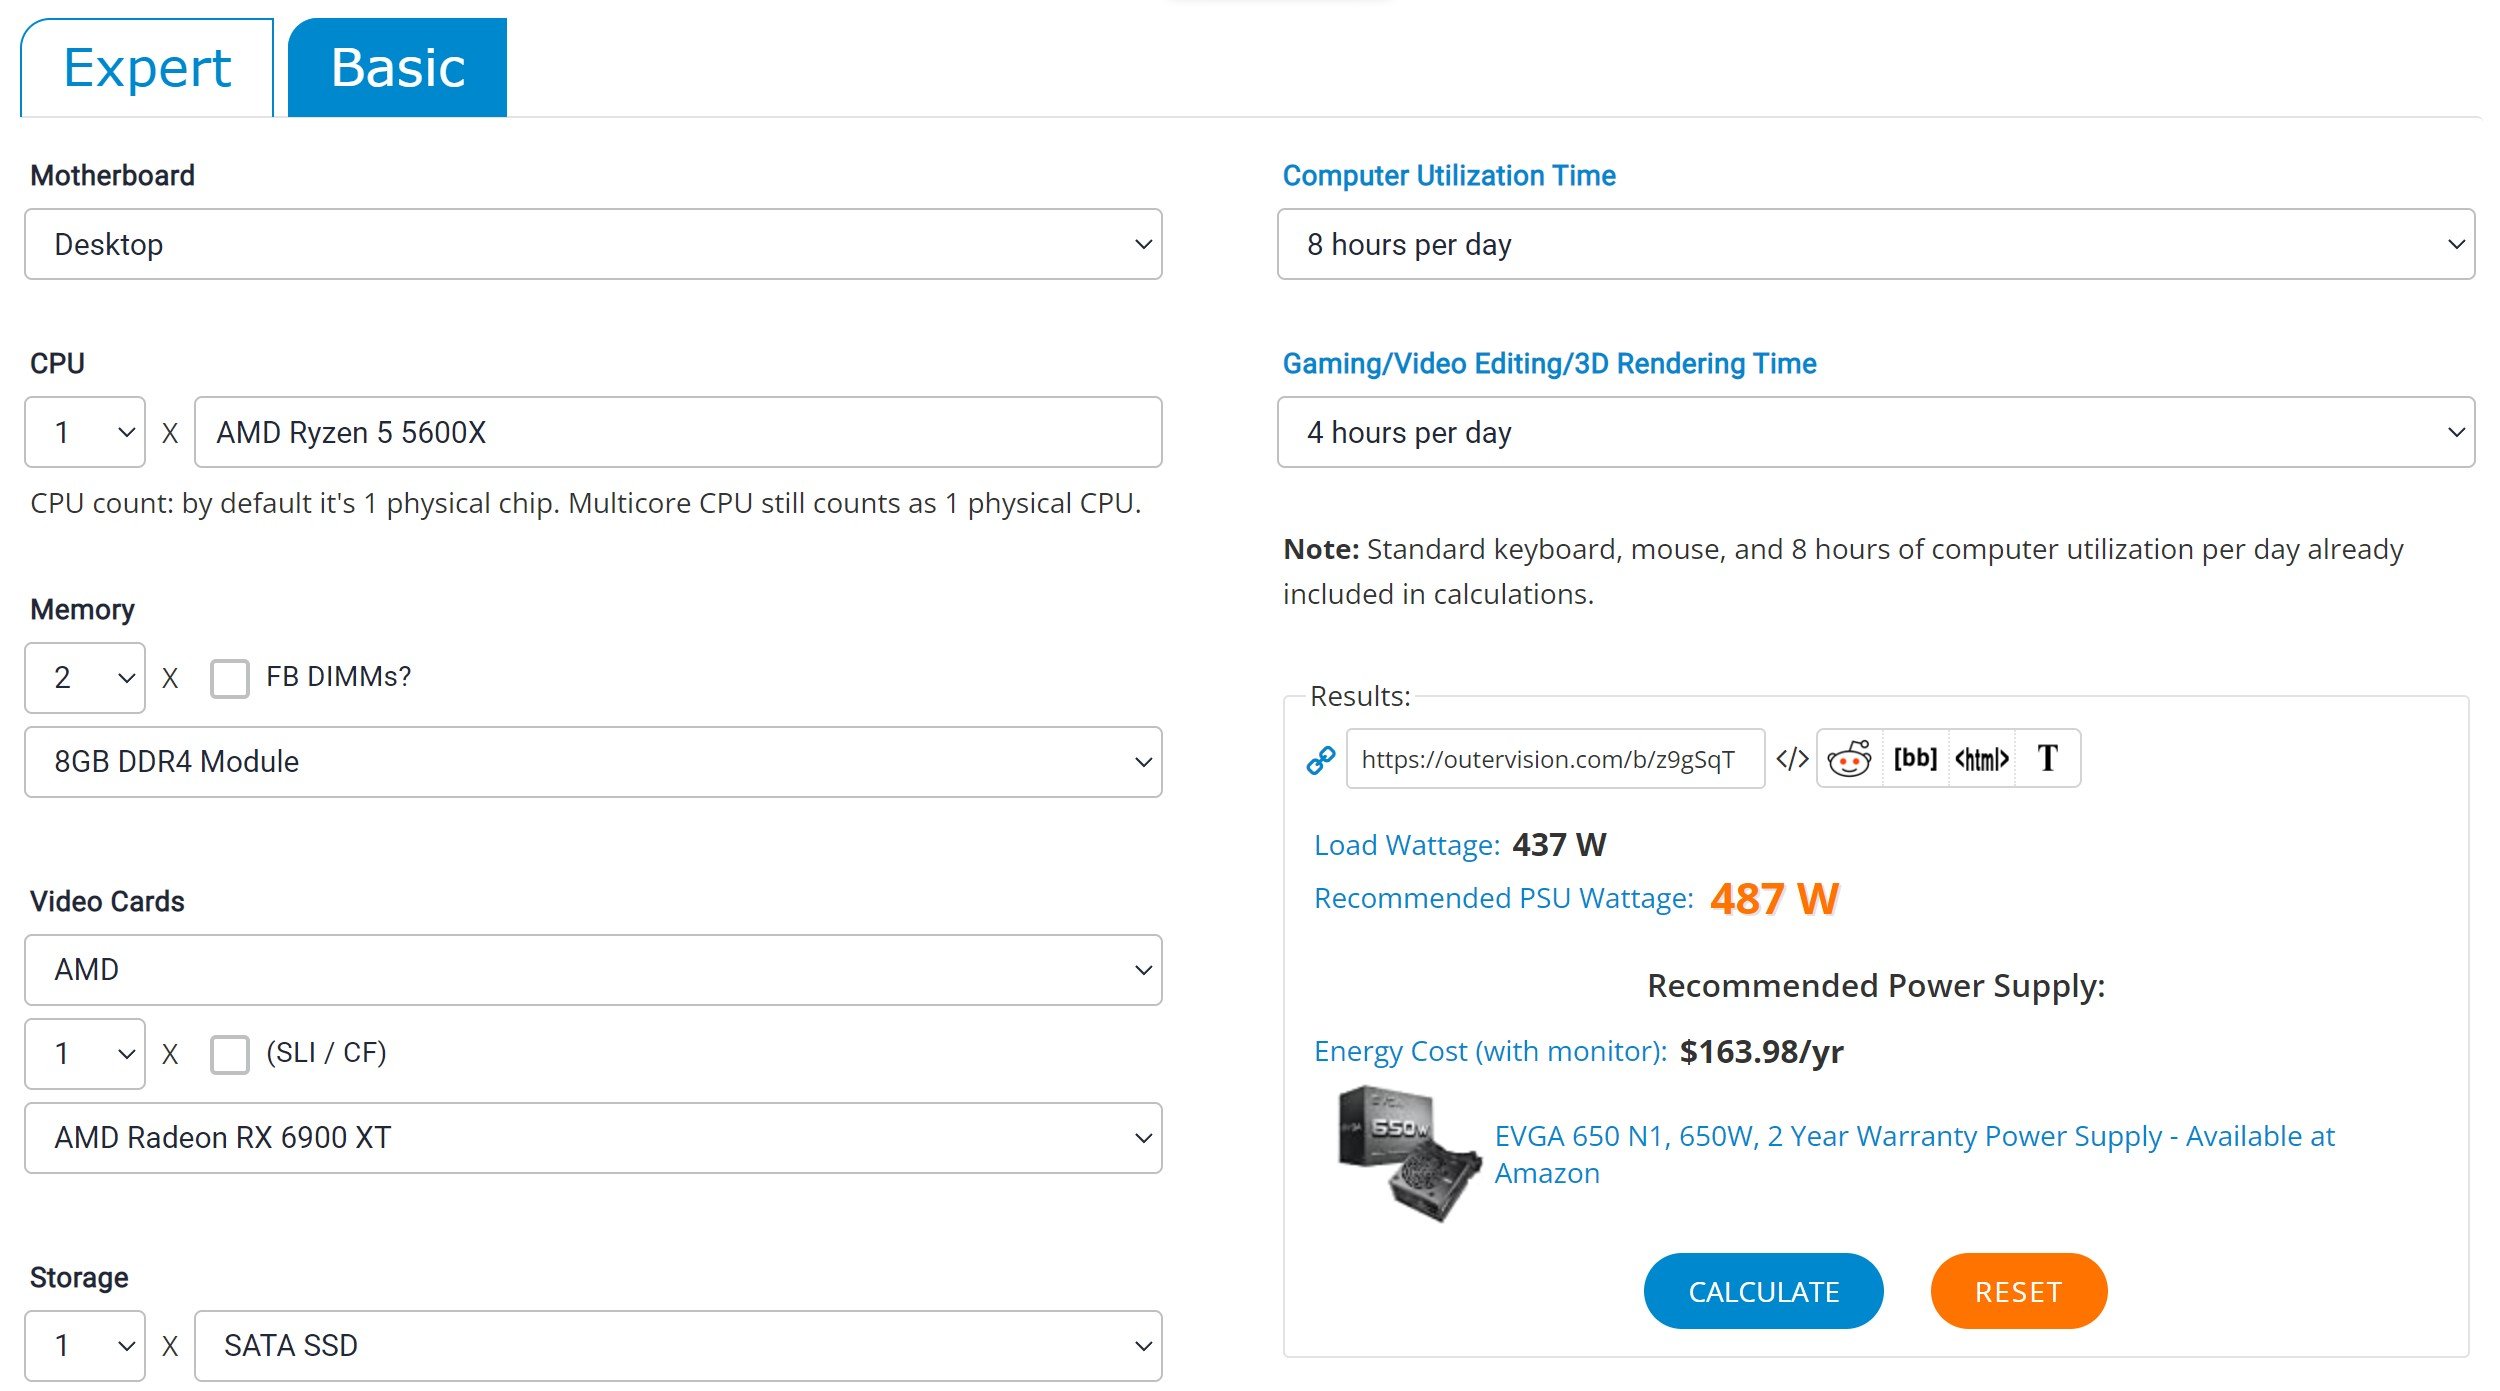
Source: Outervision
So another option is to look up the power consumption of your GPU and then add on another 100 to 200 watts.
If your current PSU is significantly below this estimate, you’ll definitely want to fork out for something more powerful. Just make sure whatever model you purchase is compatible with your PC. We have a guide to help you with that right here.
If your PSU is powerful enough, then next double-check that the voltage switch — a small side switch located on the back of most PSU models — is set to the appropriate voltage.
The “correct” voltage ultimately depends on your country; if you’re in the United States, the voltage switch should be set to 120v, while if you’re in the United Kingdom it should be 240v.
If your PSU isn’t the culprit? You’ll next want to try cleaning the CMOS.
3. Clear the CMOS
The BIOS menu allows you to take control and manage every aspect of your PC, from CPU voltage and RAM voltages to fan curves and clock speeds.
However, sometimes having that much freedom can be a problem; poorly-configured BIOS settings can definitely cause booting issues and make your computer turn on and off repeatedly!
If you’ve recently been playing around in the BIOS menu, you’ll want to clear the CMOS to reset the BIOS back to its factory default settings.
The most common way to do this is by removing the CMOS battery, though some modern motherboards have a dedicated reset button you can press. You can also use the CMOS jumper (the two to three pins near the CMOS battery).
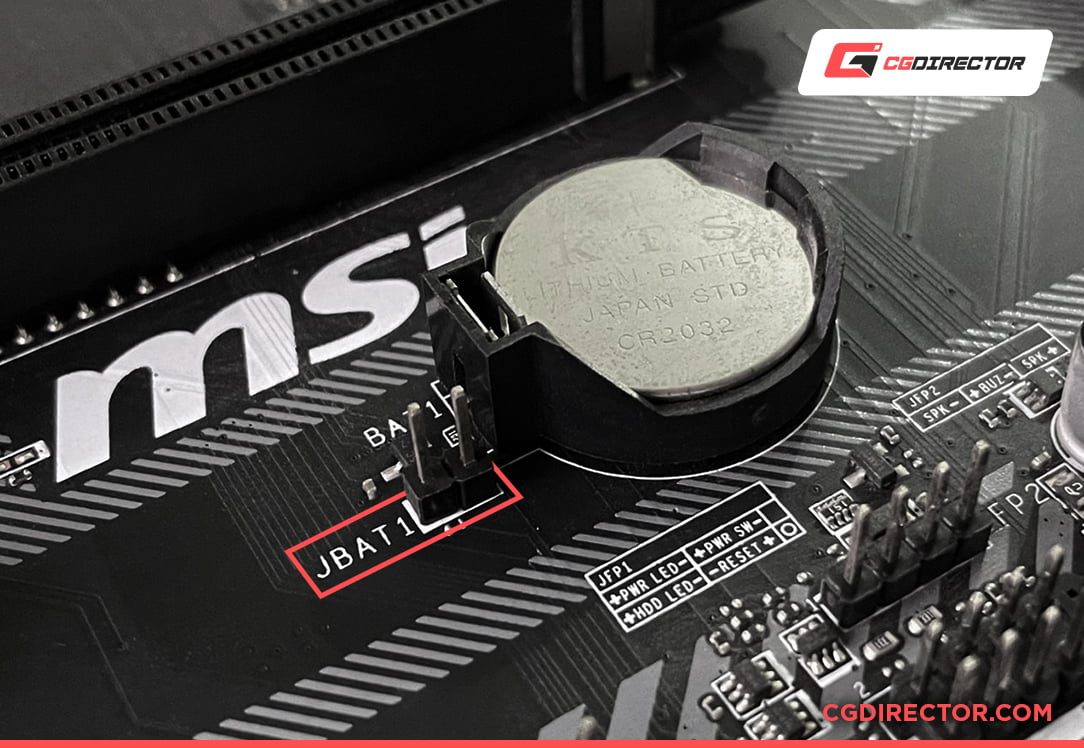
We cover how each method works in our dedicated CMOS guide, so definitely have a read of that if you’ve never cleared the CMOS before.
It’s safe to clear the CMOS. However, make sure your PC is switched off and disconnected from the power source before doing so.
If the issue still persists, consider replacing the CMOS battery, especially if you’ve had your PC for several years.
The battery can start to fail and cause problems such as booting issues, beeping noises, and unresponsive peripherals. Replacing the CMOS battery is simple and quick — Graphical Cleansing has a handy video guide on the process.
The next troubleshooting method requires you to be a little more hands-on with your hardware, so do speak to a professional for help if necessary.
4. Check and Reseat RAM
RAM essentially functions as your PC’s short-term memory: it’s a hardware component that stores temporary data your device needs to access quickly.
RAM plays a critical role in keeping things running smoothly, so if you’re experiencing booting issues it’s possible that one of your ram sticks has become unseated or faulty.
If you’re able to load into Windows for long enough before it restarts, you can use the dedicated diagnostic tool to troubleshoot any RAM issues:
- Open up the “Control Panel,” select “View by Large Icons,” then click on “Administrative Tools”
- Choose “Windows Memory Diagnostic”
- Run the tool as directed
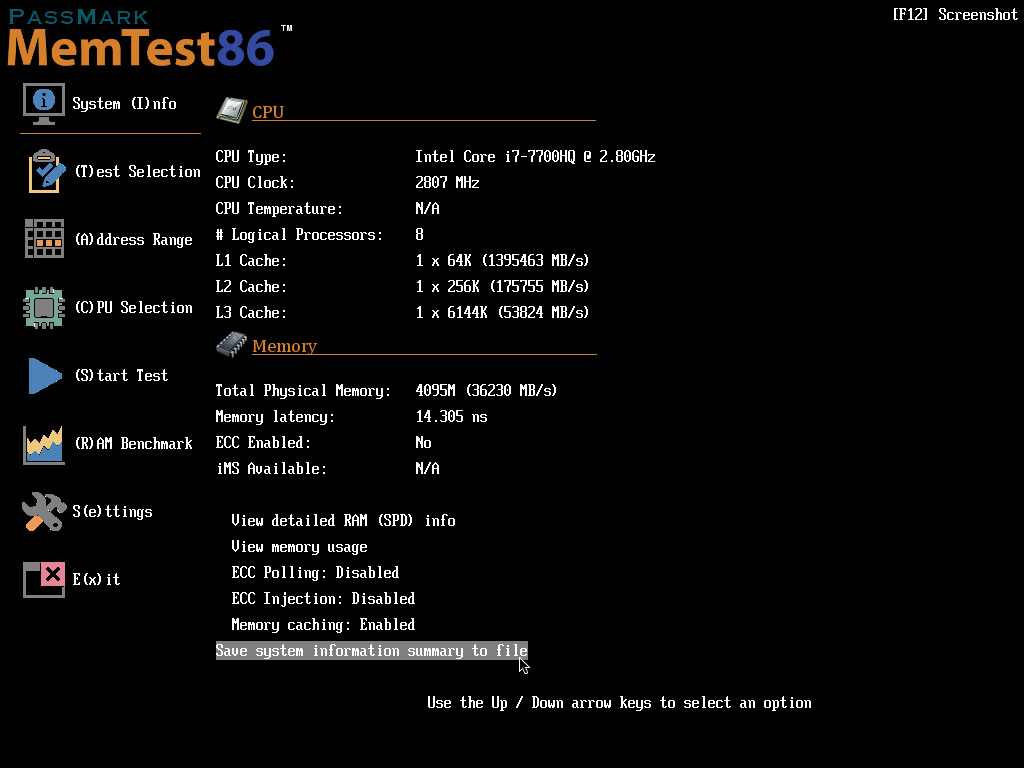
- If no issues are detected, you can download MemTest86 to run a much more comprehensive test. Keep in mind that you will need a clean USB drive for this

Source: Memtest86
If the above isn’t possible — i.e. your computer immediately switches off when you reboot it — instead open up your PC and inspect each ram stick closely.
You’ll need to check that your ram sticks are:
- Properly seated
- In the correct slots
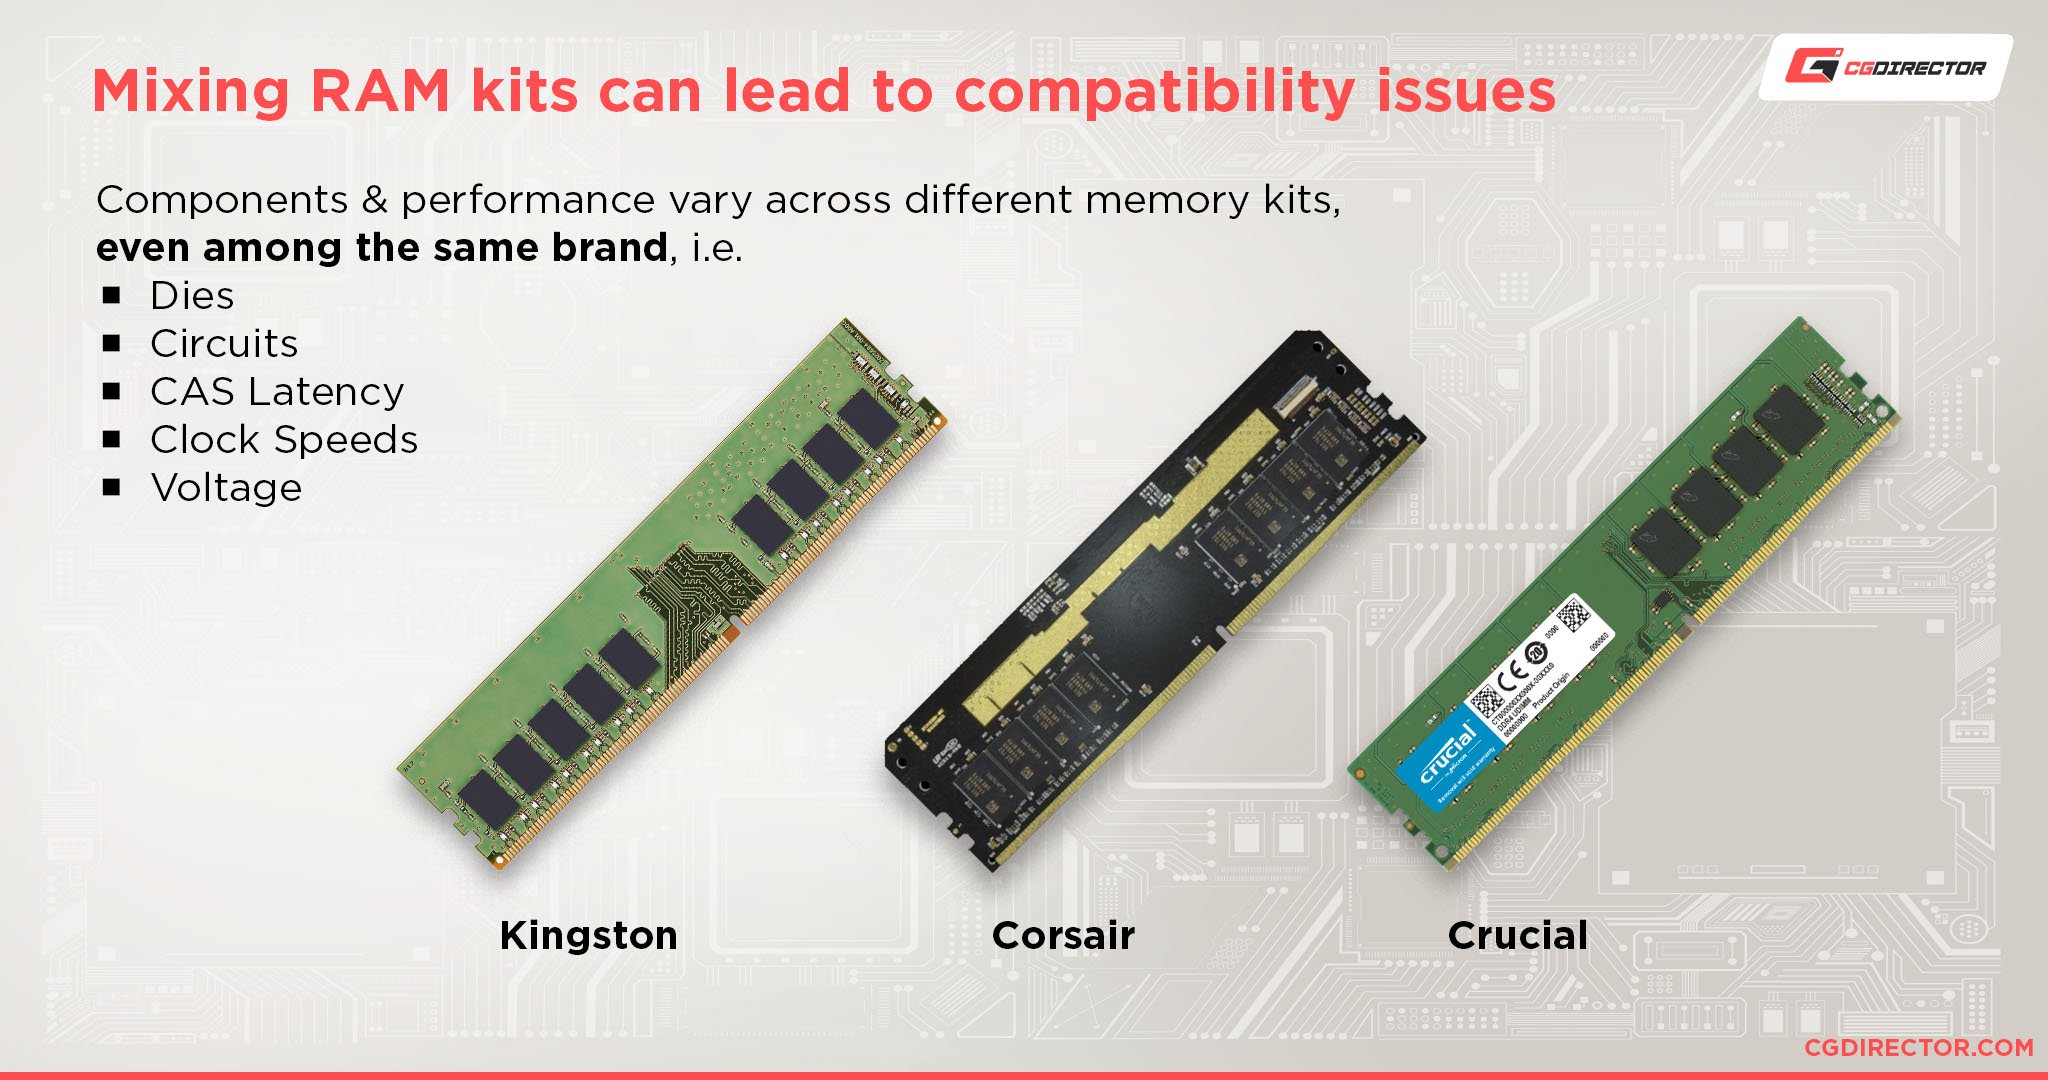
- Have the same latencies and frequencies
- From the same brand
- Are compatible with your motherboard
If that’s all clear, remove the ram sticks and examine them for signs of damage or dust. You can gently clean them using a can of compressed air, a soft-bristled brush, and a microfiber cloth.
Next, you’ll want to determine if there’s an issue with one specific ram stick through some good ol’ trial and error.
Place a single RAM stick into the furthest slot from your CPU and boot up your PC.
If it boots up without any significant issues, it’s a clear indicator that that RAM stick is working properly. Repeat this process for each RAM stick, and then test out the other motherboard slots to make sure they’re in working order too.
Any damaged RAM sticks will need to be replaced.
Unfortunately, if one of the motherboard slots isn’t working, you’ll need to hire a professional to fix the ram slot or fork out for a whole new motherboard (the latter is usually cheaper when you factor in all the repair fees).
It’s possible to fix a broken ram slot yourself, but it’s incredibly risky, complex, and requires expensive tools and soldering. We strongly advise against DIY’ing this unless you’re a hardware expert and have the spare parts and tools needed already on hand.
If your RAM modules (and the motherboard slots) have passed with flying colors, move on to the next troubleshooting method.
5. Check Core Temperatures and Eliminate Heat
High internal temperatures (above 85°C) can wreak absolute havoc on your computer’s performance, especially if these temperatures are sustained for long periods of time.
Telltale signs that your PC is struggling with heat include random restarts and shutdowns, thermal throttling, and noisy fans.
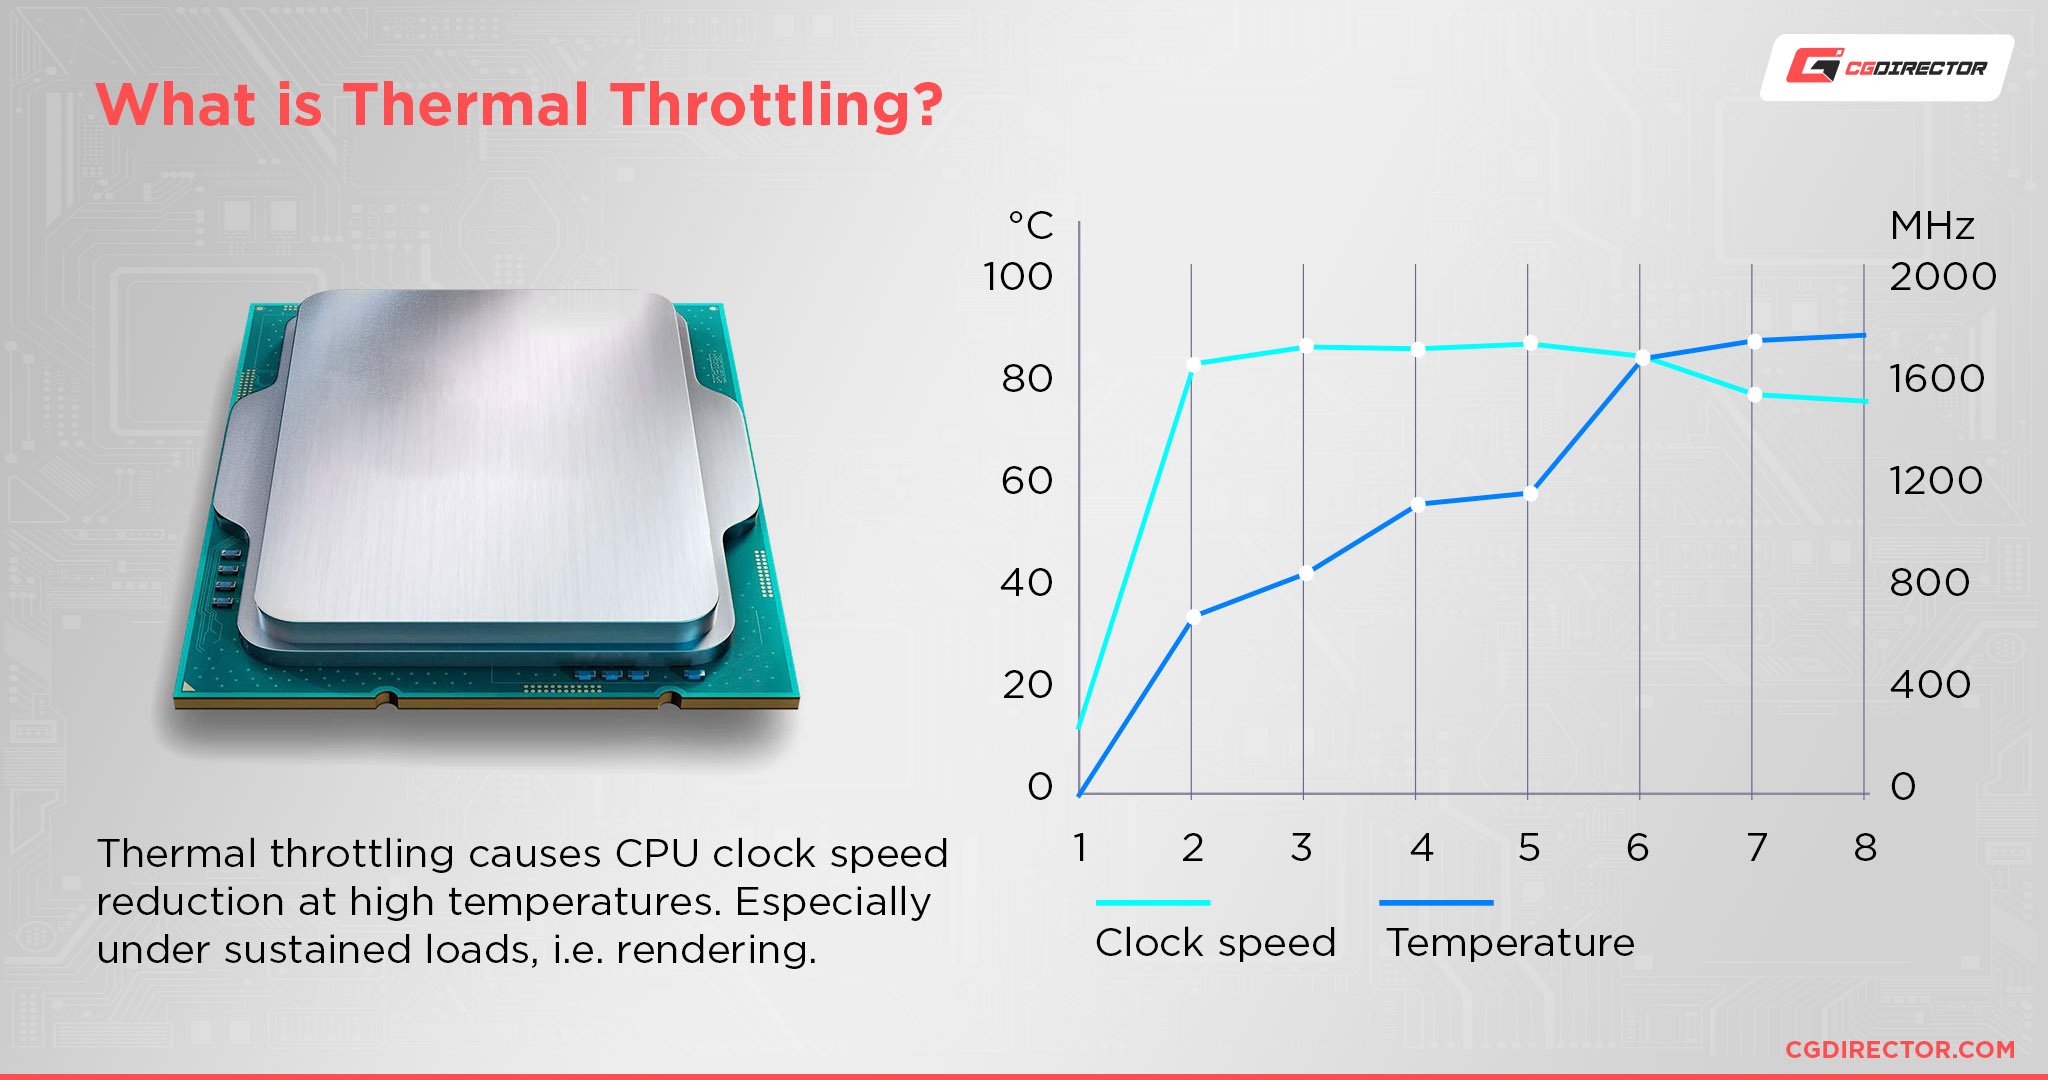
You can check the running temperature of key hardware components in the BIOS menu or with third-party software like CoreTemp.
However, if your computer switches off before you’re able to access any of this, you’ll need to instead troubleshoot your PC and check if anything is preventing it from cooling itself down properly:
- Make sure the fans are all working correctly, especially the CPU cooler fan
- Clean out any dust and debris. Pay close attention to the cooler fans and vents
- Check that the CPU heatsink is properly mounted. Reapply thermal paste if needed
- Ensure the external environment is cool — keep your device out of direct sunlight and make sure nothing is blocking the vents
- Organize all cables
- Remove any overclocking
- Upgrade your case fans
If the issue persists, it’s likely that high temperatures aren’t to blame.
So, good news: it means your hardware components haven’t sustained any heat-related damage.
Bad news: it means you still haven’t found the underlying cause.
The measures above are by far the most common solutions to a computer turning on and off repeatedly. However, if none of these have worked you’ll want to try out the additional troubleshooting steps below.
6. Additional Troubleshooting Steps
Do note that some of these steps can only be done if your PC doesn’t turn off immediately after booting:
- Resolve OS Corruption: Operating systems can become corrupted over time and cause performance issues. If you suspect your OS is corrupted, you can use the Windows System File Checker tool to identify and repair any corrupted files.
- Check for loose screws: Loose screws can cause electrical shorts and prevent your PC from booting up properly. If not dealt with quickly, you may be looking at permanent hardware damage. Switch off your PC and unplug everything (including peripherals), then gently shake it and listen out for an audible rattling noise. You should also examine internal cables closely for damage; exposed metal can touch components and cause electrical shorts too.
- Update the BIOS: If clearing the CMOS didn’t do anything, you can try updating the BIOS as a next troubleshooting measure.
- Reinstall and update drivers: This is unlikely to fix your issue, but it’s worth a try since doing so may resolve any corruption.
I hate to be the bearer of bad news, but if you’re still experiencing issues it’s likely that your motherboard is faulty and needs to be replaced.
A clear sign of a faulty motherboard is bulging or bent capacitors, so have a look out for those.
Don’t give up hope just yet though! Contact your manufacturer for further guidance before investing in a new motherboard. You can also reach out to our experts on the forum.
FAQ
Why does my computer beep when I turn it on and then shut down?
Beeps generally indicate a hardware fault or compatibility issue.
You’ll need to troubleshoot the beep code to identify which hardware component is triggering the noise — we have a dedicated guide covering beep codes to help you out. You can also check your motherboard’s manual to find out what the beep codes indicate.
Why does my computer turn on and off repeatedly with no display?
This issue is usually caused by bad BIOS settings.
To solve this particular issue, we recommend clearing the CMOS first and then checking out our other troubleshooting methods.
Can malware cause my computer to turn on and off repeatedly?
Yes, if malware has infected your device it can cause your computer to turn on and off repeatedly.
However, this is pretty rare — malware usually runs in the background and slows down your PC’s performance instead of shutting it down entirely. You can test (and remove) malware using antivirus software such as Malwarebytes.

Source: Malwarebytes
Over to You
And that’s a wrap! There’s nothing more infuriating than your computer turning on and off repeatedly, so I hope this guide has helped you solve this issue once and for all.
If your computer is still having problems, don’t worry. You won’t have to navigate the next steps alone. You can leave a comment down below and one of our team members will get back to you as soon as they can. You can also ask for help from our experts on the community forum.
If you have any remaining PC-related questions, make sure to browse the rest of our site. We have plenty of helpful articles covering virtually every tech topic, from hardware troubleshooting guides to benchmark tests.
![Computer Turns On and Off Repeatedly [Causes & Fixes] Computer Turns On and Off Repeatedly [Causes & Fixes]](https://www.cgdirector.com/wp-content/uploads/media/2023/06/Computer-Turns-On-and-Off-Repeatedly-Causes-Fixes-Twitter-1200x675.jpg)

![Why is my Computer slow all of a sudden? [Causes & Quick Fixes] Why is my Computer slow all of a sudden? [Causes & Quick Fixes]](https://www.cgdirector.com/wp-content/uploads/media/2023/01/Why-is-my-Computer-slow-all-of-a-sudden-Causes-Quick-Fixes-Twitter-594x335.jpg)

3 Comments
25 January, 2024
My computer boots and then shuts down repeatedly without me getting a screen in the monitor. The computer and monitor work fine at a friends house. Any idea what’ the problem is at my house?
25 January, 2024
Hey Helen, What sort of PC do you have? (Specs?)
We’re there any changes made recently to the hard- and software?
Alex
21 December, 2023
I got a lot of knowledge on the above points ,I would like tanks a lot