TABLE OF CONTENTS
Being able to quickly access various system settings is of the utmost importance.
And while Windows and Linux offer a suite of ways and options for making these adjustments, some changes can only be made through your system’s BIOS.
The BIOS (Basic Input Output System) is a “one-stop shop” that gives you the most vital information about your PC; this ranges from the status of its storage devices to the speed at which your RAM is running at.
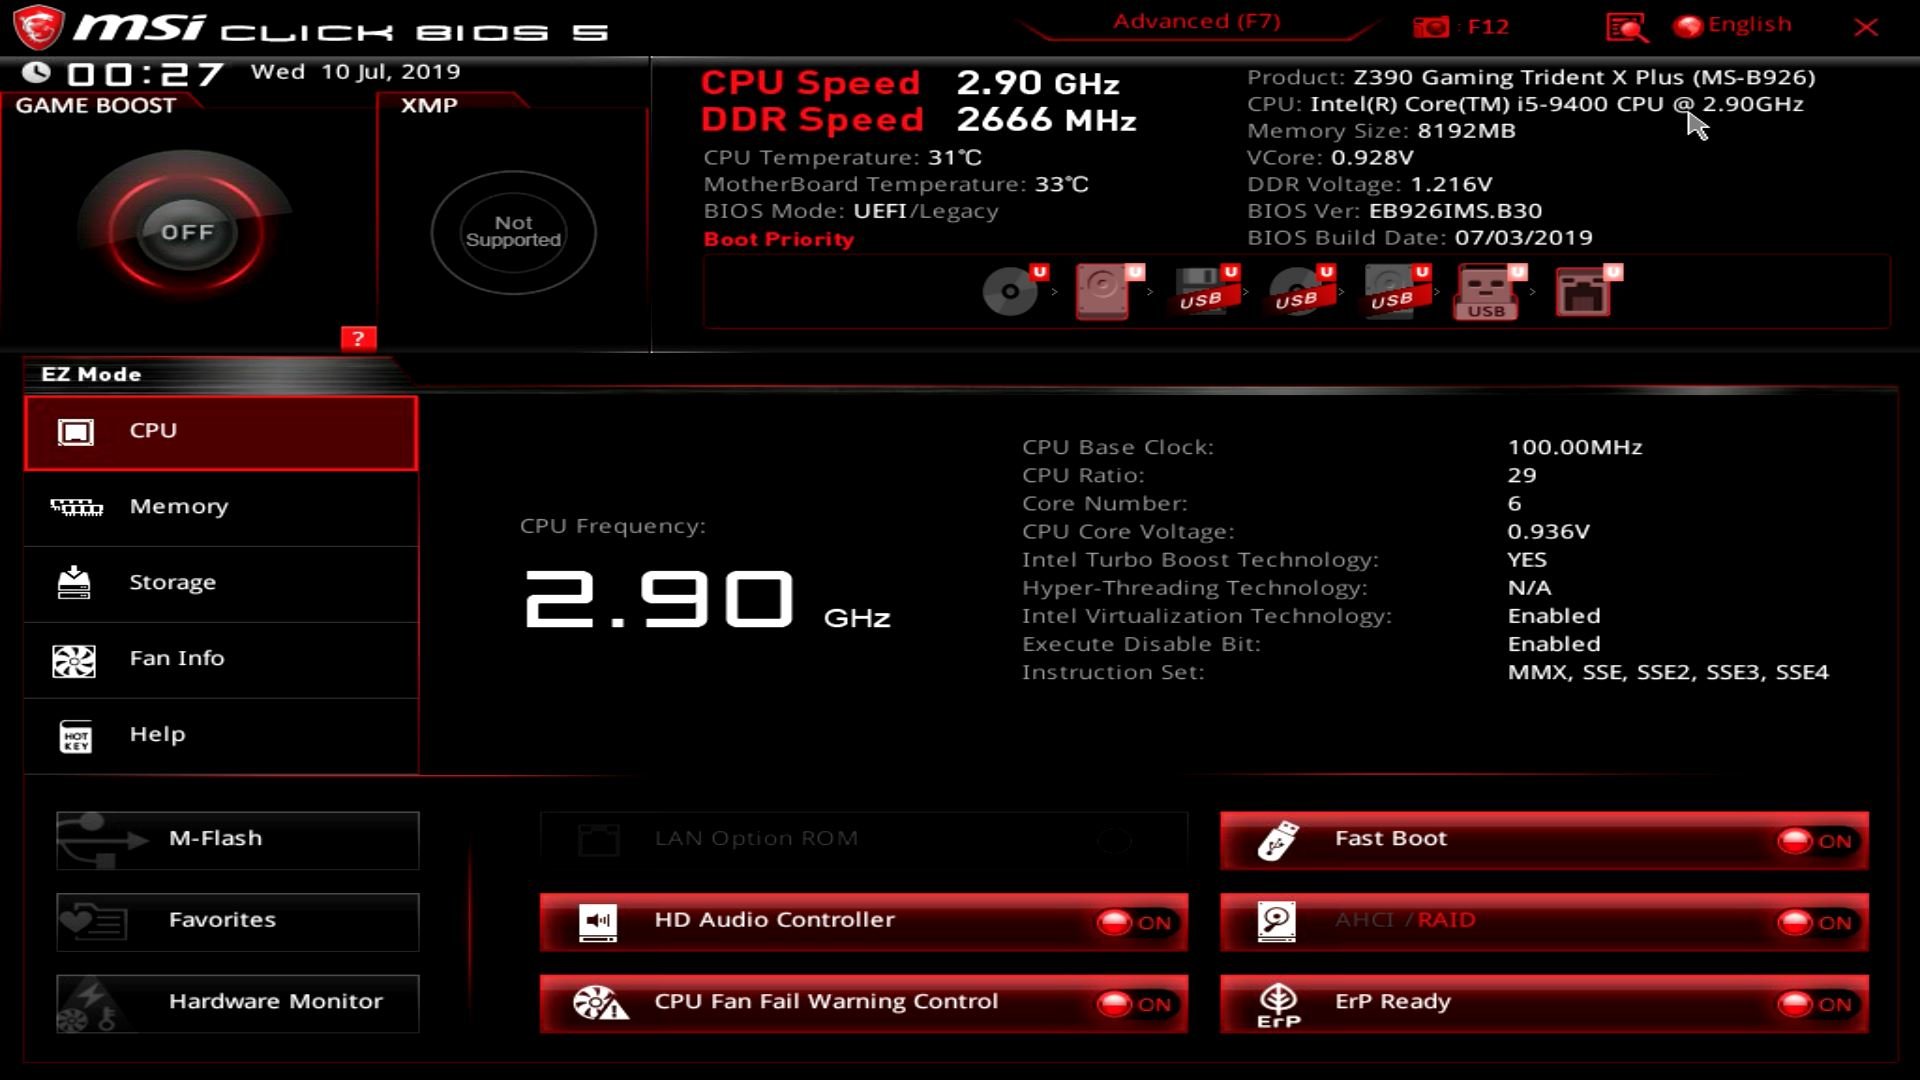
Source: MSI
You can also use the BIOS to see if all your components are working properly before booting into Windows. It goes without saying, but this certainly comes in handy whenever the need to troubleshoot arises.
Simply put: the BIOS acts as a troubleshooting gateway if you ever encounter a problem with your system that Windows just cannot fix.
It’s also crucial in overclocking as it allows you to configure RAM voltages, CPU fan curves, and a million other things.
Knowing how to enter your Motherboard’s BIOS, therefore, is of the utmost importance.
The good news is that the process itself is exceedingly simple; the only problem, however, is that it can vary ever so slightly depending on your motherboard’s manufacturer.
How to Enter BIOS
The easiest and most common way of entering the BIOS is by using the designated BIOS key.
When you turn on your computer from a power-off state, it always goes through a diagnostics procedure called POST (Power-On Self-Test).
If you hit the dedicated BIOS key before the POST cycle is completed, you will be taken to the BIOS screen instead of your operating system.
Depending on how your PC has been set up, the POST cycle will either take a few seconds, or it’ll be so fast you won’t even register it.
To ensure you don’t somehow miss this “window of opportunity,” it’s common practice to keep mashing the BIOS key repeatedly from the very moment you press the power button – until the BIOS screen presents itself.
Note: In case your system doesn’t register any key inputs during the POST cycle, you’ll have to employ an alternative method. More on that below.
As previously mentioned, different motherboard manufacturers use different BIOS keys. This gets even more convoluted when you add laptops to the mix.
The most common keys used are either DEL or F2, and you can sometimes see which key you’re supposed to press from a little line of text that appears on-screen during the POST cycle.
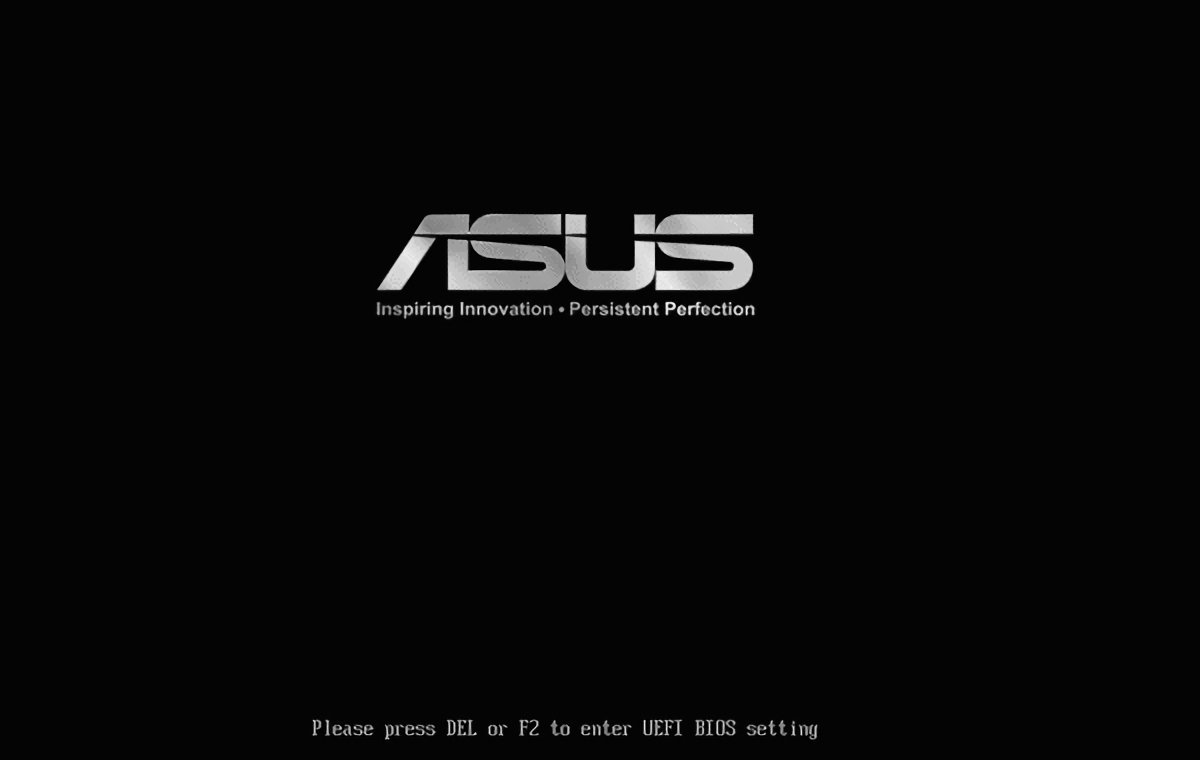
If not, you can also refer to your motherboard’s instruction manual to see which key is designated for entering the BIOS.
It might sound strange, but just because two motherboards happen to be made by the same manufacturer doesn’t mean they automatically share the same BIOS key.
Anyway, enough talk already!
Here’s a list of the most popular motherboard manufacturers, along with the keys they most often assign for entering the BIOS:
- ASRock: DEL or F2
- ASUS: DEL or F2
- Acer: DEL or F2
- Dell: F12 or F2
- ECS: DEL
- Gigabyte (and Aorus): DEL or F2
- HP: F10
- Lenovo: F2 or Fn + F2 (laptops), F1 (desktops), Enter + F1 (ThinkPads)
- MSI: DEL
- Microsoft Surface: press and hold the Power and Volume Up buttons
- Origin PC: F2
- Samsung: F2
- Toshiba: F2
- Zotac: DEL
If you want to be absolutely sure, you can also press two or more of the most popular key options in fast succession. That way, one of them should be it!
Using Windows Advanced Startup
If for some reason, you’re unable to enter the BIOS during the aforementioned POST cycle, you’ll be happy to know that Windows still includes a run-around solution.
The advanced startup menu in Windows 10/11 is meant for troubleshooting purposes and, fortunately, it can also be used for entering the BIOS:
- Find the advanced startup options in Windows settings. You can easily find this by searching “advanced startup” in the start menu and clicking on the “change advanced startup options” result.
- Once you’ve reached the Settings panel, click “Restart Now.” This will reboot your PC using advanced startup.
- Now that you’ve reached the advanced startup menu, click on “Troubleshoot.” This will open up a sub-menu with Windows’ built-in troubleshooting features.
- Select “Advanced Options.”
- Click on “UEFI Firmware Settings,” and then restart your computer to confirm your selection. Upon rebooting, you’ll be greeted with your system’s BIOS.
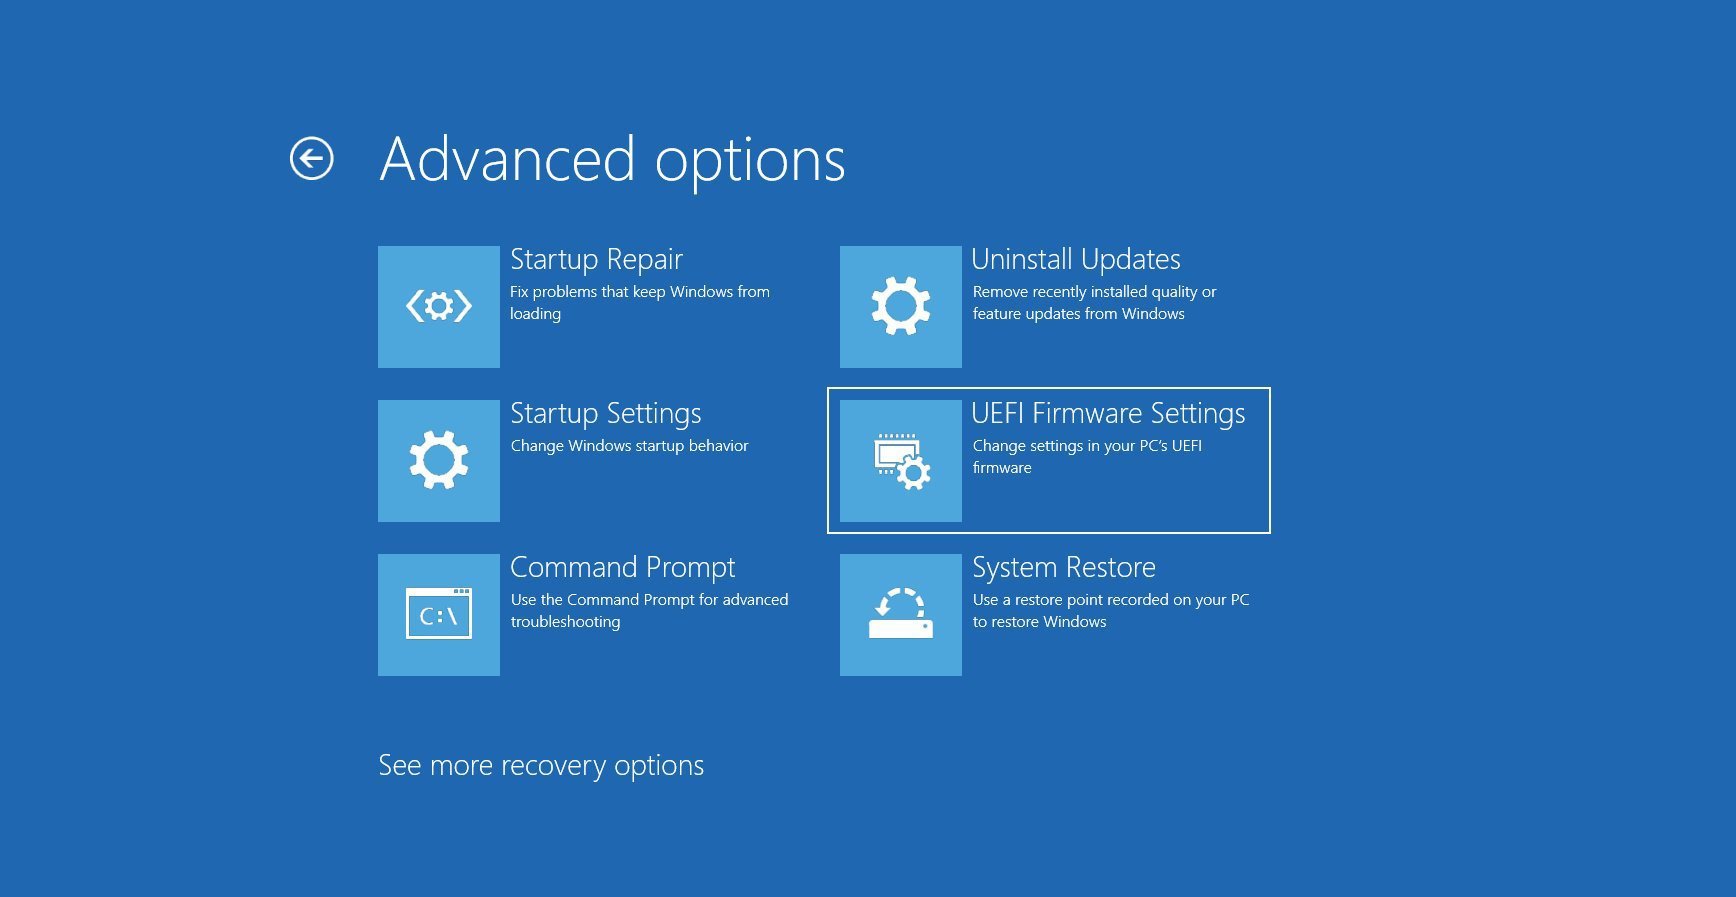
For a bit more information on the Windows Advanced Startup feature, also check out the following article.
How to Enter BIOS on Linux
In most cases, entering sudo systemctl reboot -firmware in your distro’s terminal will do the trick.
FAQ
Let’s go over a few potential questions you might have regarding this whole process.
How Do I Go Directly Into BIOS?
Entering the BIOS directly from startup can only be done using the designated BIOS key. More often than not, it’s either F2 or DEL.
How Do I Get Into BIOS Without F2/DEL?
If the designated BIOS key on your keyboard isn’t working (for whatever reason), you’ll have to use the aforementioned Windows Advanced Startup method instead.
Can I Reset My BIOS Without a Keyboard?
If you’ve tampered with the wrong settings and are no longer able to enter BIOS, you’ll have to reset your CMOS.
Conclusion
It goes without saying that many BIOS settings are “reserved” for advanced users and those who know what they’re doing.
If you change something you’re not supposed to by accident, you might find yourself in a mess that will take a lot of work to rectify.
That being said, it’s still a hugely important tool, and knowing how to access it — and when — can often make a world of difference.
How often do you enter your BIOS, and what are the settings you most often change and adjust? Let us know in the comment section below, and if you have any questions, head over to our forum and ask away!

![How To Reset An MSI BIOS? [All Possible Ways] How To Reset An MSI BIOS? [All Possible Ways]](https://www.cgdirector.com/wp-content/uploads/media/2022/09/How-To-Reset-MSI-BIOS-All-Possible-Ways-Twitter-594x335.jpg)

2 Comments
29 August, 2023
So I ended up w a supposed gaming PC tower and the old owners profile is still active. Is there a way to reset the Windows software without wiping the HD and if so can you give me the steps? He was running an Asus motherboard if that helps
2 June, 2023
My pc displays BOOTMGR is missing however i was just trying to split my local disc